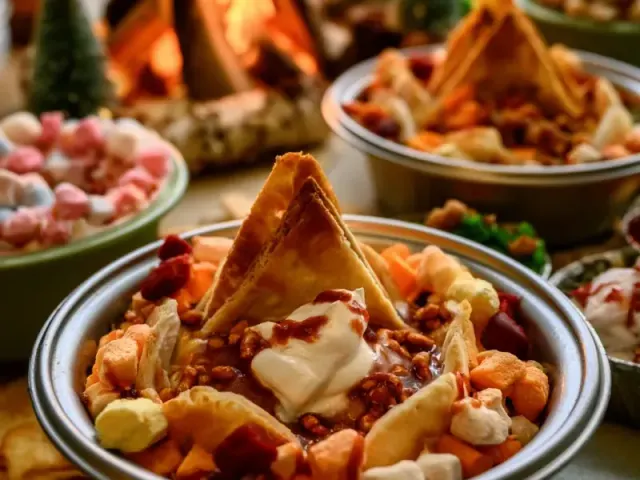
One-Pot Kids Camping Party Snacks Made Easy
The smell of melting cheese hits you first—sharp and buttery, rising from a cast iron skillet perched over a camp stove. Then the sizzle of beans and tomatoes settling into the heat. This is one-pot kids camping party snacks done right: no bowls, no plates, no fuss. Just a single skillet that becomes the centerpiece of your campsite table, surrounded by happy, hungry kids.

Why One-Pot Works for Kids at Camp
Kids love food they can grab and go. A one-pot snack means they don't have to wait for plates or utensils. They just reach in with a chip and scoop. For you, it means less cleanup and more time enjoying the fire. The key is layering, not mixing. You build the snack in the skillet so every scoop gets a little bit of everything.
The Ratio That Makes It Work
I keep the ratio at one part toppings to two parts chips. That means for every 10 ounces of chips, I use about 5 ounces of shredded cheese, half a can of beans, and a handful of veggies. This gives you enough coverage without drowning the chips. Too many toppings and the chips turn to mush. Too few and the snack feels sparse. The cheese acts as the glue, holding everything together as it melts.
Choosing the Right Cheese
Mild cheddar melts smoothly without getting greasy. Pre-shredded cheese works at camp, but it often has anti-caking agents that make it take longer to melt. Shredding a block of cheese at home saves time and gives you a creamier melt. For a sharper flavor, mix half cheddar with half Monterey Jack. Avoid hard cheeses like Parmesan—they don't melt evenly over a camp stove.
Heat Management: Camp Stove vs. Campfire vs. Grill
On a camp stove, set the burner to medium. Too high and the bottom chips burn before the cheese melts. If you see smoke, lift the skillet and lower the heat. On a campfire, let the wood burn down to a bed of medium-hot coals—no flames. Place the skillet on a grate or directly on the coals, and rotate it every 4 minutes to avoid hot spots. On a grill, set it to medium heat (about 350°F) and place the skillet directly on the grate. Cover the grill to trap heat.
The Lid Trick
A lid or foil cover is essential. Without it, the cheese takes too long to melt and the chips at the bottom burn. I use heavy-duty foil crimped tight around the skillet edges. This creates a mini oven. Check at 8 minutes: lift the foil carefully with heat-resistant gloves. The cheese should be fully melted and bubbly. If not, cover and cook for 2 more minutes. The visual cue is the cheese pulling away from the skillet edges slightly, and the chips turning golden on the edges.
Toppings That Work at Camp
Stick with toppings that don't need refrigeration until serving. Black beans, canned corn, cherry tomatoes, and olives are shelf-stable. For a party feel, add pickled jalapeños (skip for younger kids) or sliced radishes for crunch. Keep sour cream and salsa in a cooler until right before serving. Diced avocado browns quickly, so add it at the last minute. The goal is to keep the prep simple so you're not juggling a dozen containers at the campsite.
Make-Ahead Prep at Home
Shred the cheese and store it in a zip-top bag. Drain and rinse the beans, then pack them in a small container. Halve the cherry tomatoes and slice the olives, storing each in separate containers. At camp, you just layer and cook. This takes 10 minutes of prep at home and saves you 20 minutes of chopping at the campsite. Keep all prepped items in the cooler until ready to use.
Safety at the Campsite
The skillet stays hot for 10 minutes after you remove it from the heat. Place it on a heat-safe surface like a trivet or a flat rock away from the table edge. Teach kids to wait for the count of 60 before reaching in. Use heat-resistant gloves when handling the lid or foil. Keep a bucket of water or sand nearby when cooking over a campfire. For food safety, do not leave the cooked snack out for more than two hours. In hot weather (above 90°F), reduce that to one hour. Refrigerate leftovers promptly.
Variations for Different Tastes
Swap black beans for refried beans spread on the chips before adding cheese. Use canned chili without beans for a meatier version (heat the chili separately and drizzle on top after cooking). For a milder version, skip the jalapeños and use roasted red peppers from a jar. For a breakfast twist, add scrambled eggs and crumbled bacon after the cheese melts. Each variation still follows the same one-pot method and ratio.
The Takeaway
One-pot kids camping party snacks are about simplicity and fun. The skillet becomes the serving dish, the chips become the utensils, and everyone eats together. Focus on the layering, the heat control, and the lid. Get those right, and you'll have a campsite full of happy kids and a skillet that wipes clean in seconds.
Frequently Asked Questions
Can I make this snack on a campfire without a grate?
Yes. Build a small fire and let it burn down to hot coals. Place the skillet directly on a bed of coals, or use a small tripod with a chain to hang the skillet. Rotate the skillet every 3-4 minutes for even heat.
What if I don't have a cast iron skillet?
A heavy-duty aluminum foil pan works as a substitute. Place it on a camp stove or grill grate over medium heat. Cover with foil and cook for 10-12 minutes. Watch carefully because foil pans heat unevenly.
How do I keep the chips from getting soggy?
Use thick, restaurant-style tortilla chips. Drain and rinse the black beans well to remove excess moisture. Avoid adding wet toppings like salsa until after cooking. Layer chips and cheese in two separate layers rather than mixing everything together.
One-Pot Cheesy Campfire Nachos
A quick, one-pot snack layered with tortilla chips, melted cheese, and toppings, cooked over a camp stove or campfire for an instant kids' party favorite.
- 12-inch cast iron skillet
- lid or heavy-duty foil
- camp stove or campfire grate
- heat-resistant gloves
- 1 10 oz bag of sturdy tortilla chips
- 1 8 oz block of mild cheddar cheese (shredded)
- 1 15 oz can of black beans (drained and rinsed)
- 1 cup of cherry tomatoes (halved)
- 1/2 cup of pickled jalapeños (optional, for older kids)
- 1/4 cup of sliced black olives
- 1/2 cup of sour cream (for serving)
- 1/4 cup of fresh cilantro (chopped (for serving))
- Aluminum foil (for lid substitute)
- Set up your camp stove or campfire grate. If using a campfire, let it burn down to a medium-hot bed of coals (about 350°F–400°F, or when you can hold your hand 5 inches above the grate for 4 seconds).
- Place the 12-inch cast iron skillet on the heat source and let it warm for 2 minutes over medium heat.
- Spread a single layer of tortilla chips evenly across the bottom of the skillet. Use chips that are thick and sturdy, as thin ones will get soggy.
- Sprinkle half of the shredded cheddar cheese over the chips. Distribute the black beans, cherry tomatoes, jalapeños (if using), and black olives evenly on top.
- Add the remaining chips and top with the rest of the cheese. Make sure the cheese covers most of the chips for even melting.
- Cover the skillet with a lid or a sheet of heavy-duty foil crimped tightly around the edges. This traps the heat and melts the cheese without burning the chips.
- Cook for 10–12 minutes over medium heat (or over medium-hot coals). Check at 8 minutes: lift the lid carefully with heat-resistant gloves. The cheese should be fully melted and bubbly, and the chips at the edges should be lightly golden but not burnt.
- Remove from heat and let stand for 2 minutes. The skillet will stay hot, so place it on a heat-safe surface.
- Dollop sour cream on top and sprinkle with fresh cilantro. Serve directly from the skillet, using the chips as scoops. Everyone eats from the same pot—no plates needed.
- Common mistake to avoid: don't stir the layers. Stirring breaks the chips and makes a clumpy mess. Let the heat and steam do the work.
Keep perishable toppings (sour cream) in a cooler with ice packs until serving. For no-refrigeration, skip the sour cream and use a squeeze of lime instead. This snack is best eaten fresh, but you can reheat leftovers in the skillet over low heat for 5 minutes. To make ahead: shred cheese and prep veggies at home, store in separate containers in the cooler. At camp, just layer and cook. If using a grill, place the skillet directly on the grate and cover with foil. For a campfire, use a tripod or grate to hold the skillet above the coals. Check for hot spots by rotating the skillet halfway through. Always use heat-resistant gloves when handling the skillet. Common allergens: dairy (cheese, sour cream). For a dairy-free version, use vegan cheese shreds and a cashew-based sour cream. Gluten-free as written. For nut-free, ensure toppings are nut-free. Consult a qualified professional for personal dietary decisions.
Recipe: One-Pot Cheesy Campfire Nachos
Equipment
- 12-inch cast iron skillet
- lid or heavy-duty foil
- camp stove or campfire grate
- heat-resistant gloves
Ingredients
- 1 10 oz bag of sturdy tortilla chips
- 1 8 oz block of mild cheddar cheese (shredded)
- 1 15 oz can of black beans (drained and rinsed)
- 1 cup of cherry tomatoes (halved)
- 1/2 cup of pickled jalapeños (optional, for older kids)
- 1/4 cup of sliced black olives
- 1/2 cup of sour cream (for serving)
- 1/4 cup of fresh cilantro (chopped (for serving))
- Aluminum foil (for lid substitute)
Instructions
- Set up your camp stove or campfire grate. If using a campfire, let it burn down to a medium-hot bed of coals (about 350°F–400°F, or when you can hold your hand 5 inches above the grate for 4 seconds).
- Place the 12-inch cast iron skillet on the heat source and let it warm for 2 minutes over medium heat.
- Spread a single layer of tortilla chips evenly across the bottom of the skillet. Use chips that are thick and sturdy, as thin ones will get soggy.
- Sprinkle half of the shredded cheddar cheese over the chips. Distribute the black beans, cherry tomatoes, jalapeños (if using), and black olives evenly on top.
- Add the remaining chips and top with the rest of the cheese. Make sure the cheese covers most of the chips for even melting.
- Cover the skillet with a lid or a sheet of heavy-duty foil crimped tightly around the edges. This traps the heat and melts the cheese without burning the chips.
- Cook for 10–12 minutes over medium heat (or over medium-hot coals). Check at 8 minutes: lift the lid carefully with heat-resistant gloves. The cheese should be fully melted and bubbly, and the chips at the edges should be lightly golden but not burnt.
- Remove from heat and let stand for 2 minutes. The skillet will stay hot, so place it on a heat-safe surface.
- Dollop sour cream on top and sprinkle with fresh cilantro. Serve directly from the skillet, using the chips as scoops. Everyone eats from the same pot—no plates needed.
- Common mistake to avoid: don't stir the layers. Stirring breaks the chips and makes a clumpy mess. Let the heat and steam do the work.