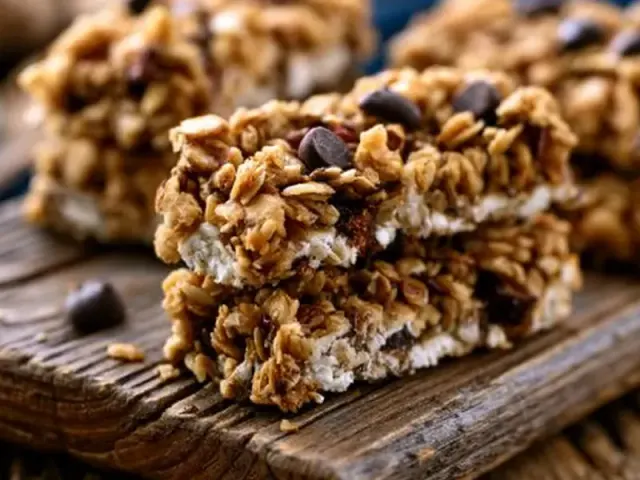
No-Fuss Camping Granola Bars for Kids
The first time I made granola bars for a camping trip, I ended up with a crumbly mess that looked more like birdseed than a snack. My kids didn't complain—they ate it from a bag—but I wanted something they could hold in one hand while scrambling up a trail. That's when I zeroed in on the binder ratio that actually works: 1 part butter to 1 part honey to 1/2 part brown sugar, plus a nut butter that glues it all together.

Why This Ratio Matters
Granola bars fall apart when the wet-to-dry ratio is off. I keep the base at 2 cups rolled oats and 1 cup crisp rice cereal. The oats provide chew; the rice cereal adds lightness. For the binder, I use 1/2 cup butter, 1/2 cup honey, and 1/4 cup brown sugar. That's 1.25 cups of wet ingredients for 3 cups of dry. The butter and honey melt together into a sticky syrup that coats every flake. The brown sugar adds depth and helps the bars set firm without being hard.
Peanut butter is the final glue. Stir it in off the heat so it doesn't separate. If the mixture looks oily, you've overheated it—next time, pull the pan sooner. The texture should be glossy and thick, like a thick caramel sauce.
Making Them at Camp
You can prep these entirely at home, wrap them in wax paper, and stash them in a cooler. But if you want to make them at the campsite, it's just as easy. Use a camp stove or a small pot over low coals. Melt the butter, honey, and brown sugar over medium heat, stirring constantly. The bubbles should be gentle—if they sputter, the heat is too high. Remove from heat, stir in peanut butter and vanilla, then pour over the dry mix.
Press the mixture firmly into a parchment-lined pan. I use the back of a spatula, then a flat-bottomed cup to really compress it. Loose bars are sad bars. Let them cool on a grate away from the fire for 20 minutes, then wrap the pan in foil and set it in the cooler for 45 minutes. That chill sets the bars perfectly.
Kid-Friendly Variations
My go-to add-ins are mini chocolate chips and dried cranberries, but you can swap in whatever your kids like. Sunflower seeds add crunch; shredded coconut gives chew. For nut-free camps, use sunflower seed butter and skip the chocolate if there's a dairy issue. Just keep the total add-ins to 1 cup so the bars don't overflow.
One mistake I see often is adding too many big chunks. Large dried apricots or whole almonds make the bars hard to cut and uneven to eat. Chop any large dried fruit into raisin-sized pieces.
Food Safety at Camp
These bars are shelf-stable for a day in a cool spot, but for longer trips, keep them in a cooler. Butter and peanut butter can spoil in warm weather. Wrap each bar individually in wax paper—this prevents them from sticking and keeps them fresh. If you're hiking, pack them in a hard-sided container so they don't get crushed.
For families with allergies, note that oats are often processed near wheat. Use certified gluten-free oats if needed. And always check labels on chocolate chips for dairy if that's a concern. For personalized dietary advice, consult a qualified professional.
The Takeaway
These no-fuss camping granola bars for kids come together with a simple ratio and a firm press. Make them ahead or at the fire. They hold up in a backpack, a cooler, or a little hand. No crumbs, no fuss—just a chewy, satisfying snack that keeps everyone moving.
Frequently Asked Questions
Can I make these granola bars without a stove?
Yes. Use a campfire: melt butter, honey, and brown sugar in a small pot over low coals, then stir in peanut butter off the heat. Press the mixture as directed and let it set in a cool spot or cooler.
How do I keep the bars from crumbling?
The key is the binder ratio: 1/2 cup butter plus 1/4 cup brown sugar and 1/2 cup honey to 2 cups oats and 1 cup cereal. Press very firmly into the pan and let them chill fully before cutting.
Can I make these gluten-free?
Yes. Use certified gluten-free rolled oats and ensure your rice cereal is labeled gluten-free. All other ingredients are naturally gluten-free.
What if I don't have a 9x13 pan?
Use an 8x8-inch pan for thicker bars—just increase pressing time and chill for 1 hour. Or shape the mixture into a log on foil, wrap tightly, and slice after chilling.