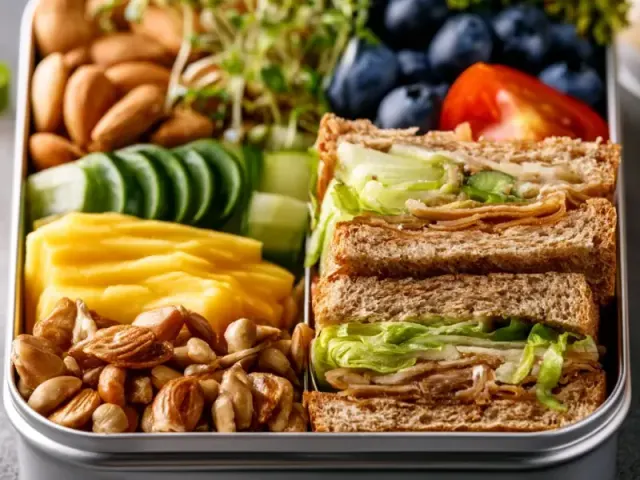
No Fridge Camping Lunch Box Ideas That Hold Up on the Trail
I still remember the first time I unwrapped a lunch on the trail and found a soggy, sad mess of bread and squashed tomatoes. That day taught me a hard lesson: not all packable lunches are created equal. For a no-refrigeration camping lunch, you need ingredients that hold their structure, stay safe without ice, and actually taste good when you're hungry and miles from a deli counter.

Here's what I've learned after years of trial and error. The key is to start with a sturdy base, choose ingredients that don't weep moisture, and wrap everything like you're preparing it for a bumpy ride. I keep the ratio at roughly 1 part protein-rich spread (like hummus or nut butter) to 2 parts crunchy vegetables, plus a small handful of seeds or nuts for texture. That balance keeps the wrap from getting heavy or wet.
Why No Refrigeration Works for These Lunch Box Ideas
No-refrigeration camping lunch box ideas rely on ingredients that are naturally shelf-stable or can stay safe at room temperature for several hours. The USDA states that perishable foods left in the "danger zone" (40°F–140°F) for more than two hours should be discarded. But when you use ingredients like whole vegetables, shelf-stable hummus (which is pasteurized and sealed), and seeds, you bypass that risk entirely. The key is to pack them in the morning and eat them within 4 to 6 hours, or up to 8 hours if the temperature stays below 60°F.
I always pack my lunches in an insulated lunch bag or a dry bag, even without ice. That extra layer of insulation slows down temperature changes. And I never leave the bag in direct sun. If I'm hiking in hot weather, I stash it in the middle of my pack, surrounded by my water bottles and clothing, which act as a thermal buffer.
Trail-Proof Hummus & Veggie Wrap
This is my go-to for a hearty, no-refrigeration lunch that doesn't need any cooking or reheating. The hummus provides protein and healthy fat, the vegetables give crunch and vitamins, and the seeds add a satisfying pop. I make these the night before or the morning of my hike, and they've never let me down.
Ingredients and Substitutions
For the base, I use large tortillas or gluten-free wraps. Avoid thin, delicate tortillas that tear easily. The hummus should be shelf-stable—the kind sold in jars or single-serving packets that don't need refrigeration until opened. For the vegetables, I stick with carrot, bell pepper, and spinach. These three don't release much water, even after hours in a pack. If I want extra protein, I add sunflower seeds or pumpkin seeds. Nutritional yeast is optional but adds a savory, cheesy note without dairy.
For a keto version, I swap the tortilla for large romaine lettuce leaves or low-carb wraps, and I replace the carrot with extra bell pepper and cucumber (seeded). For a vegan version, this recipe is already plant-based. For gluten-free, I use certified gluten-free tortillas or large collard green leaves (blanch them briefly at home to soften).
Step-by-Step Assembly
Start by grating the carrot and slicing the bell pepper into thin strips. Thin slices are easier to roll and less likely to poke through the tortilla. In a bowl, combine the vegetables, spinach, seeds, nutritional yeast (if using), smoked paprika, salt, and lemon juice. The lemon juice adds acidity and helps preserve the vegetables.
Lay a tortilla flat. Spread the hummus evenly, leaving a 1-inch border. This border is crucial—it prevents the filling from oozing out when you roll. Place the vegetable mixture in a line down the center. Fold the sides inward, then roll tightly from the bottom up. Think of it like rolling a burrito: snug but not so tight that the tortilla tears.
Wrap each finished roll in parchment paper, then seal it in a resealable plastic bag or beeswax wrap. The parchment prevents sticking and adds a layer of protection. Pack the wraps flat in your backpack, not on their sides. This keeps the filling evenly distributed.
More No Refrigeration Lunch Box Ideas
If wraps aren't your style, try these other packable options that follow the same principles.
Deconstructed Salad Jar
Use a wide-mouth mason jar. Layer ingredients from bottom to top: dressing (oil and vinegar, no dairy), then hearty vegetables like carrot and bell pepper, then seeds or nuts, and finally leafy greens at the top. The greens stay dry until you shake the jar at lunchtime. No refrigeration needed if you use a vinegar-based dressing and skip cheese or meat. Shake it and eat straight from the jar or pour into a bowl.
Seed and Nut Butter Energy Bites
These are perfect for a quick snack or a light lunch. Mix 1 cup rolled oats (use certified gluten-free if needed), 1/2 cup nut or seed butter (almond, sunflower, or tahini), 1/3 cup honey or maple syrup, 1/2 cup shredded coconut, and 1/4 cup chia seeds. Roll into 1-inch balls and refrigerate at home to set. They stay stable for days without refrigeration because the sugar and low moisture act as preservatives. Pack them in a container or bag.
Hard Cheese and Crackers
Hard cheeses like aged cheddar, Parmesan, or Gouda can stay safe at room temperature for up to 8 hours if kept in a cool, shaded place. Wrap them in parchment paper, then a cloth. Pair with sturdy crackers, dried fruit, and nuts. Avoid soft cheeses, which spoil quickly. This is a simple, satisfying lunch that requires no prep beyond slicing.
Food Safety and Storage Tips
When you're cooking without a fridge, temperature control is everything. Here are my non-negotiable rules:
- Keep all food in the shade. Direct sun can raise the temperature inside your pack by 20 degrees.
- Use an insulated lunch bag or a dry bag, even without ice. It slows down heat transfer.
- Eat perishable items (like hummus after opening, or cheese) within 4-6 hours of packing. If the temperature is above 80°F, reduce that to 2 hours.
- Pack food in individual portions. That way, you only open what you'll eat, keeping the rest sealed and cooler.
- Freeze a water bottle the night before and use it as a cold pack. It will thaw by lunch and give you cold water to drink.
For meat-based lunches, I don't recommend going without a cooler unless you're using shelf-stable pouches (like tuna or chicken pouches) that you eat immediately after opening. Even then, keep them out of the sun.
Takeaway
No-refrigeration camping lunch box ideas are simpler than you think. The secret is choosing ingredients that stay firm, don't leak moisture, and are safe at room temperature for the length of your hike. With a little prep at home, you can pack a lunch that's hearty, tasty, and ready to eat without any fuss. No soggy bread, no squashed fruit, no worry.
Frequently Asked Questions
How long can no-refrigeration wraps last in a backpack?
These wraps are safe to eat for 4-6 hours after packing if kept below 70°F. In cooler weather (below 60°F), they can last up to 8 hours. Always use an insulated lunch bag if possible, and avoid leaving them in direct sunlight.
Can I use canned beans in a no-fridge lunch?
Canned beans require refrigeration after opening, so they are not suitable for no-fridge camping unless you use single-serving pouches that are eaten immediately. For this recipe, hummus made from chickpeas is shelf-stable until opened, making it a safer choice.
What are the best vegetables for no-fridge wraps that won't get soggy?
Firm, low-moisture vegetables like bell peppers, carrots, cucumbers (seeded), and cabbage hold up well. Avoid tomatoes, which release water and make the wrap soggy. Spinach is fine because it wilts without releasing much liquid.
How do I keep wraps from falling apart on the trail?
Roll them tightly and wrap in parchment paper first, then place in a resealable bag or beeswax wrap. The parchment prevents sticking and adds structure. Pack them flat at the top of your pack, not under heavy gear.
Trail-Proof Hummus & Veggie Wrap
A sturdy, no-fridge wrap filled with shelf-stable hummus, crunchy vegetables, and a protein punch from seeds. Prepped at home, packed flat, and ready to eat cold.
- cutting board
- sharp knife
- mixing bowl
- spoon
- parchment paper
- resealable plastic bags or beeswax wraps
- 4 large (10-inch tortillas or gluten-free wraps, 1 cup shelf-stable hummus (no refrigeration needed until opened, use single-serving packets for multi-day trips), 1 large carrot, peeled and grated, 1 red bell pepper, thinly sliced, 1 cup fresh spinach leaves, 1/4 cup sunflower seeds or pumpkin seeds, 2 tablespoons nutritional yeast (optional, for cheesy flavor), 1/2 teaspoon smoked paprika, 1/4 teaspoon salt, 2 tablespoons lemon juice (from a bottle or fresh))
- In a mixing bowl, combine grated carrot, sliced bell pepper, spinach, seeds, nutritional yeast (if using), smoked paprika, salt, and lemon juice. Toss well. 2. Lay a tortilla flat on a clean surface. Spread 1/4 cup hummus evenly over the tortilla, leaving a 1-inch border around the edge. 3. Place 1/4 of the vegetable mixture in a line down the center of the tortilla. 4. Fold the sides of the tortilla inward over the filling, then roll tightly from the bottom up, keeping the roll snug. 5. Wrap each completed wrap tightly in parchment paper, then place in a resealable plastic bag or beeswax wrap. 6. Pack flat in your backpack, pressing out excess air. No cooler needed. 7. Eat within 4-6 hours of packing, or store in a cool, shaded part of your pack (below 70°F) for up to 8 hours.
Food safety: Shelf-stable hummus is safe at room temperature until opened; for multi-day trips, use single-serving packets. Wraps are best eaten the same day. Keep wraps away from direct sun. For a keto version, use large lettuce leaves or low-carb tortillas and replace carrots with extra bell pepper. For a vegan version, this recipe is already vegan. For gluten-free, use certified gluten-free tortillas. Common allergens: seeds (tree nuts if using pine nuts). If you have specific dietary needs, consult a qualified professional.
Recipe: Trail-Proof Hummus & Veggie Wrap
Equipment
- cutting board
- sharp knife
- mixing bowl
- spoon
- parchment paper
- resealable plastic bags or beeswax wraps
Ingredients
- 4 large (10-inch tortillas or gluten-free wraps, 1 cup shelf-stable hummus (no refrigeration needed until opened, use single-serving packets for multi-day trips), 1 large carrot, peeled and grated, 1 red bell pepper, thinly sliced, 1 cup fresh spinach leaves, 1/4 cup sunflower seeds or pumpkin seeds, 2 tablespoons nutritional yeast (optional, for cheesy flavor), 1/2 teaspoon smoked paprika, 1/4 teaspoon salt, 2 tablespoons lemon juice (from a bottle or fresh))
Instructions
- In a mixing bowl, combine grated carrot, sliced bell pepper, spinach, seeds, nutritional yeast (if using), smoked paprika, salt, and lemon juice. Toss well. 2. Lay a tortilla flat on a clean surface. Spread 1/4 cup hummus evenly over the tortilla, leaving a 1-inch border around the edge. 3. Place 1/4 of the vegetable mixture in a line down the center of the tortilla. 4. Fold the sides of the tortilla inward over the filling, then roll tightly from the bottom up, keeping the roll snug. 5. Wrap each completed wrap tightly in parchment paper, then place in a resealable plastic bag or beeswax wrap. 6. Pack flat in your backpack, pressing out excess air. No cooler needed. 7. Eat within 4-6 hours of packing, or store in a cool, shaded part of your pack (below 70°F) for up to 8 hours.