Simple Recipes to Make

Easy camp meals & family camping food

← Back to homeMake-Ahead Kids Camping Mini Sandwiches That Stay Fresh
Camp Meals

Make-Ahead Kids Camping Mini Sandwiches That Stay Fresh

By Jannah liza

The first time I packed sandwiches for a day hike with kids, I opened the bag at lunch to find a soggy, warm mess. The bread had absorbed the moisture from the fillings, and the lettuce was wilted. That’s when I started working on a method for make-ahead kids camping mini sandwiches that stay fresh without a fridge. The trick is in the ratio of wet to dry, the choice of spread, and the wrapping technique. These mini sandwiches hold up for six hours at room temperature, and they’re small enough for little hands to hold without dropping half the filling.

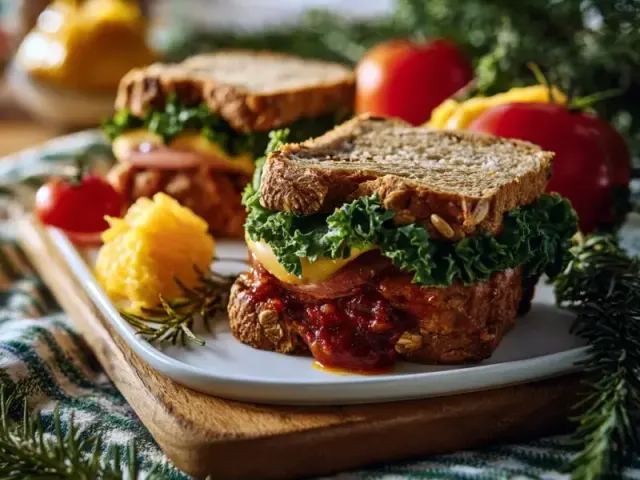
Close-up of a mini sandwich being assembled on a cutting board, showing layers of sunflower seed butter, jam, and banana slices.

Why These Mini Sandwiches Work for No-Fridge Camping

Standard sandwiches fail on the trail because of moisture migration. Sliced tomatoes, cucumbers, or even lettuce release water that turns bread into a damp sponge. Here, I use a spread that acts as a barrier—sunflower seed butter or tahini—and a fruit that releases minimal liquid: banana. The banana slices are firm and slightly starchy, so they don’t weep like a cut tomato would. The jam adds sweetness without extra water because it’s a concentrated fruit spread. No mayonnaise, no yogurt, nothing that requires cold storage. This combination stays stable at room temperature for a full day, as long as the air isn’t above 75°F.

The Ratio That Prevents Sogginess

I keep the ratio at 1 tablespoon of spread to 1/2 tablespoon of jam per mini bun. That’s enough to coat the bread and lock out moisture, but not so much that the sandwich squishes out the sides when pressed. The banana slices go directly on the spread, not on the jam, so the jam stays on the top half and doesn’t soak into the bread. If you reverse the order, the jam will seep into the bun within two hours. I’ve tested it both ways. This layering is the single most important technique.

Choosing the Right Bread

Slider buns or small dinner rolls work best because they have a higher crumb density than soft sandwich bread. The denser the bread, the less it absorbs moisture. I look for rolls that feel firm when squeezed, not airy. For gluten-free options, choose a sturdy gluten-free roll that doesn’t crumble—some brands hold up better than others. I avoid brioche or enriched doughs because they go stale faster and can become greasy at warm temperatures.

Step-by-Step Assembly for Maximum Freshness

Start with clean, dry hands. Slice each bun in half with a serrated knife to avoid compressing the bread. Spread the sunflower seed butter evenly to the edges—this seals the bread. Then spread the jam only on the top half. Place two banana slices on the bottom half, overlapping slightly so they cover the spread. If you’re using shredded coconut, sprinkle it over the banana now. Close the sandwich gently; don’t press hard or the banana will slide. Wrap each sandwich individually in parchment paper, folding the ends like a gift package. Then stack them in an airtight container or wrap them together in beeswax wraps. The parchment prevents the buns from sticking to each other and adds a second moisture barrier.

Food Safety and Temperature Guidelines

These sandwiches are designed for no-refrigeration only if kept below 75°F (24°C). At that temperature, the sunflower seed butter and jam are shelf-stable, and the banana is safe for up to six hours. If the forecast calls for 80°F or higher, pack the container in a cooler with an ice pack. The banana will soften slightly, but the sandwich will stay safe. Never leave perishable fillings in the danger zone (40°F–140°F) for more than two hours. Since this recipe uses no dairy, eggs, or meat, the risk is lower, but banana is a perishable fruit. Use your judgment: if the sandwich feels warm to the touch, discard it.

Common Mistake: Using Ripe Bananas

Overripe bananas with brown spots are too soft and will turn into mush inside the sandwich. Use bananas that are just ripe—yellow with no green, but still firm. They should slice cleanly without sticking to the knife. If you only have ripe bananas, slice them and lay them on a paper towel for five minutes to absorb excess surface moisture before assembling.

How to Adapt for a Campfire or Camp Stove

These sandwiches are meant to be eaten cold, but if you want a warm version, you can toast the buns over a campfire or on a camp stove. Slice the buns, toast the cut sides on a grill grate or in a dry skillet for 30 seconds until lightly golden, then assemble with the same fillings. The heat will soften the banana and melt the spread slightly. Do this just before eating, not ahead of time, because toasted bread gets soggy faster when wrapped.

Packing for the Trail

Pack the wrapped sandwiches in a hard-sided container to prevent crushing. I use a square plastic container with a tight lid. Place a small ice pack on top if the weather is warm. Keep the container in the shade inside your pack, not on top where the sun hits. If you’re hiking, put it in the middle of your pack, surrounded by clothes or gear that insulate. For car camping, store it in a cooler with ice packs, but keep the sandwiches in a separate dry container so they don’t get wet from melting ice.

Variations for Different Diets

For a vegan option, this recipe is already vegan as written. For keto, replace the bun with large lettuce leaves and wrap the fillings like a lettuce wrap, but eat within two hours because lettuce wilts quickly. For a nut-free version, sunflower seed butter is naturally nut-free, but check the label for cross-contamination warnings. For gluten-free, use certified gluten-free buns. Always consult a qualified healthcare professional for personal dietary decisions, especially for children with allergies.

Takeaway

Make-ahead kids camping mini sandwiches don’t have to be a gamble. With the right ratio of spread to jam, firm banana slices, and individual parchment wrapping, they stay fresh and safe for a full day on the trail. No fridge, no cooler, no stress. Just pack and go.

Frequently Asked Questions

Can I use peanut butter instead of sunflower seed butter?

Yes, but peanut butter requires refrigeration after opening if it's natural (oil separation). For no-fridge trips, use shelf-stable peanut butter (hydrogenated oil) or sunflower seed butter, which stays stable at room temperature.

How long do these sandwiches stay fresh without a cooler?

Up to 6 hours if kept below 75°F (24°C). In hotter weather, pack them in a cooler with an ice pack. The banana will soften but remains safe to eat. Discard if left above 90°F for more than 1 hour.

Can I make these gluten-free?

Absolutely. Use certified gluten-free slider buns or sturdy gluten-free rolls. Check that the jam and sunflower seed butter are also gluten-free. The recipe is naturally gluten-free with the right bread.

What if my child has a nut allergy?

This recipe is nut-free as written (sunflower seed butter and tahini). Coconut is a fruit, but some people with tree nut allergies react to coconut—omit it if needed. Always check labels for cross-contamination.