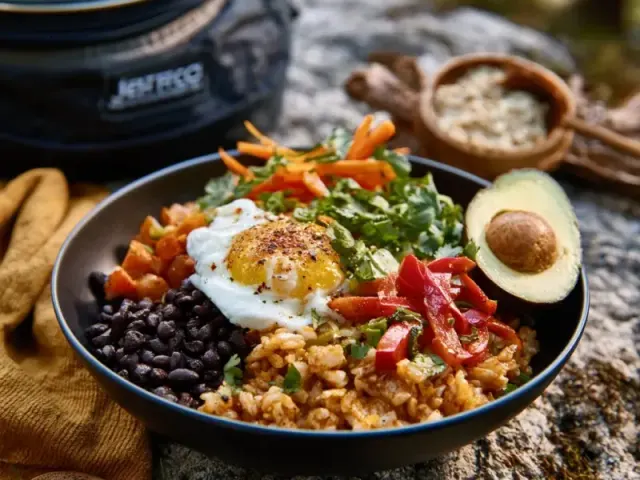
Make Ahead Camping Burrito Bowls: No Fuss, No Fridge
The first time I packed burrito bowls for a camping trip, I made every mistake you can imagine. Soggy rice. Bland beans. A cooler that turned into a lukewarm soup by day two. I learned the hard way that make-ahead camping food needs a different approach—one that prioritizes texture, food safety, and simplicity at the trailhead.

These no-fuss make ahead camping burrito bowls solve all that. No fridge required for the base. No fire needed to cook them at camp. Just a single container per person, a quick reheat on a camp stove, and dinner is ready while everyone else is still fumbling with their gear.
The Ratio That Works
I keep the ratio at 1 part beans to 1 part rice to ½ part vegetables by volume. That gives you a sturdy, scoopable mixture that won't turn to mush. For four servings, that's one cup each of dry rice, drained black beans, and diced veggies (onion plus bell pepper), plus half a cup of corn for sweetness.
The key is to drain the canned tomatoes well. Too much liquid makes the rice soggy and the whole thing a sad, wet mess. I press them in a fine-mesh strainer with the back of a spoon until no more liquid drips out. That one step separates a good burrito bowl from a forgettable one.
Cooking Method for Texture
Brown rice is non-negotiable here. White rice turns to paste after a day in a container. Cook it until just tender—about 35 minutes—then fluff it and let it cool completely before mixing. Hot rice into the skillet will steam the vegetables into submission.
When you sauté the onion and bell pepper, go for color. Five minutes over medium heat, stirring occasionally, until the edges brown and the kitchen smells like a campfire you haven't built yet. Then the garlic goes in for just 60 seconds—any longer and it turns bitter.
The bean mixture should simmer uncovered for exactly five minutes. You want it thick enough to mound on a spoon, but not dry. A splash of water or vegetable broth rescues it if needed. The visual cue: the mixture should glisten, not look dusty.
Packing for No-Refrigeration
Here's the make-ahead magic: this entire mixture is fully cooked and safe at room temperature for up to four hours. That covers your drive to the trailhead, the hike in, and setup time. For longer trips, pack the jars in a cooler with ice packs—they'll stay good for three days.
I use wide-mouth quart jars because they stack, seal tight, and let you eat straight from the jar if you're lazy. But any airtight container works. The trick is to let the mixture cool completely before packing. Steam inside a sealed container breeds bacteria. I spread it on a baking sheet for 20 minutes to cool evenly.
At the Campsite
Reheating takes five minutes. Dump the jar into a skillet over medium heat on your camp stove. Stir occasionally until it's steaming throughout—165°F internal temperature, which you can check with a probe thermometer if you carry one. The aroma of cumin and smoked paprika will draw every hungry camper within 50 feet.
If you packed cheese, stir it in off the heat so it melts without separating. Fresh cilantro and a squeeze of lime turn this from trail food into something you'd serve at home. The lime also cuts the richness of the beans and brightens the whole bowl.
Adaptations and Allergen Notes
For a vegan version, skip the cheese or use your favorite plant-based shreds. For gluten-free, this recipe is naturally safe—just check your spice labels for cross-contamination if that's a concern. For a keto adaptation, swap the rice for finely chopped cauliflower that you sauté until tender. The ratio changes to 2 parts cauliflower to 1 part beans.
Common allergens in this recipe: dairy (cheese) and, rarely, sulfites in dried spices. For any dietary concerns, consult a qualified professional for your specific needs.
Food Safety on the Trail
I cannot overstate this: do not leave perishable food in the danger zone (40-140°F) for more than two hours. If you're hiking in hot weather, keep the jars in the middle of your pack away from direct sun. A small ice pack in a dry bag works wonders. When you reheat, make sure it's piping hot all the way through—not just warm on the outside.
If you're using a campfire grate instead of a stove, place the skillet directly on the coals, not over flames. Coals give steady, even heat. Flames scorch the outside while the middle stays cold. Use a lid or foil to trap heat and speed up the process.
One last tip: pack a small bottle of dish soap and a scrub sponge. Cleaning a skillet with dried bean residue is a special kind of misery. A little hot water and soap at camp makes it bearable.
Your Takeaway
These no-fuss make ahead camping burrito bowls are the workhorse of any no-refrigeration trip. They're forgiving, customizable, and taste better on day two than they did fresh. The technique is simple, the ingredients are shelf-stable, and the result is a hot, satisfying meal that fuels your next adventure.
Frequently Asked Questions
Can I use instant rice instead of brown rice?
Yes, instant rice works. Cook according to package directions and reduce the water accordingly. The texture will be softer but still fine for burrito bowls.
How long can these burrito bowls stay at room temperature?
Up to 4 hours if kept below 90°F. In hot weather, keep them in a cooler with ice packs and consume within 2 days. Always reheat to 165°F before eating.
Can I freeze these burrito bowls?
Yes, freeze in airtight containers for up to 3 months. Thaw in the refrigerator overnight before your trip. Reheat thoroughly at camp.
What protein can I add for non-vegetarian version?
Add 1 cup cooked, shredded chicken or ground beef to the skillet with the beans. Ensure it reaches an internal temperature of 165°F when reheating at camp.