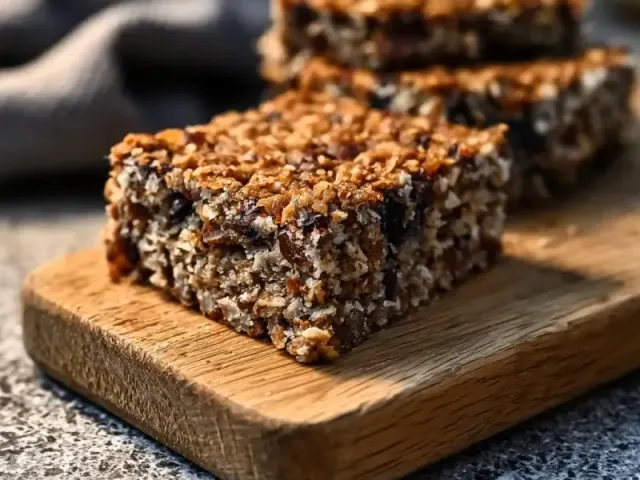
Hearty Make Ahead Camping Breakfast Bars
The first time I packed breakfast bars for a camping trip, I opened my food bag to find a crumbly mess. The bars had softened in the heat, leaving oats and dried fruit scattered at the bottom of the bag. That's when I started testing ratios. I needed a bar that stayed intact without refrigeration, held its shape in a backpack, and still tasted good on day four.

Why These Bars Work
The secret is the binder-to-dry ratio. I keep it at 1 part wet binder to 2.5 parts dry ingredients by volume. That means for every cup of wet ingredients (nut butter, honey, oil), I use two and a half cups of dry (oats, coconut, nuts, fruit). This ratio creates a bar that is dense but not greasy, chewy but not sticky. The coconut oil solidifies at room temperature, helping the bar hold its shape without a refrigerator.
Choosing Your Ingredients
Oats
Use rolled oats, not quick oats. Quick oats absorb liquid too fast and make the bars mushy. Rolled oats give texture and structure. If you need gluten-free, buy certified gluten-free oats — cross-contamination is common in standard oats.
Nut Butter
Almond butter has a neutral flavor and binds well. Sunflower seed butter works for nut-free, but it reacts with baking soda (not used here) and can turn green — no issue in this no-bake recipe. Stir your nut butter well before measuring, as oil separation changes the ratio.
Sweetener
Honey is thicker than maple syrup, so it binds better. If using maple syrup, reduce the coconut oil by 1 tablespoon to keep the bar from being too wet. For vegan bars, maple syrup is the swap.
Step-by-Step Technique
Warm the wet ingredients gently. Over medium-low heat, stir the almond butter, honey, coconut oil, vanilla, and salt until smooth. If you boil the mixture, the honey will thin out and the bars won't set properly. The target temperature is around 100°F — just warm enough to blend, not hot.
Pour the warm liquid over the dry ingredients. Stir with a stiff spatula until every oat flake is coated. This takes about 2 minutes of thorough mixing. The mixture should look uniformly damp, not dry patches.
Transfer to the lined pan. Press with the back of a measuring cup or your palm. Apply even, firm pressure. I press for 30 seconds across the entire surface. The tighter the pack, the cleaner the cut and the less crumble in your pack.
Chill for at least 1 hour. This sets the coconut oil. If you're in a hurry, 30 minutes in the freezer works. Then lift out, cut into 12 bars, and wrap individually.
Storage and Packing for the Trail
Wrap each bar in wax paper or parchment, then pack them in a hard-sided container. A plastic takeout container works well. Do not use a soft bag — the bars will rub against each other and crumble. In cool weather (below 70°F), these bars stay firm for 5 days without a cooler. In hot weather, keep them in the cooler to prevent the coconut oil from softening.
If the bars do soften, don't panic. They're still safe to eat — just messier. You can also freeze them before your trip; they thaw in about 30 minutes.
Adaptations for Special Diets
Gluten-free: Use certified gluten-free oats. All other ingredients are naturally gluten-free.
Vegan: Replace honey with maple syrup and reduce coconut oil by 1 tablespoon.
Nut-free: Use sunflower seed butter instead of almond butter. Omit almonds or replace with pumpkin seeds.
Keto: Replace oats with 1 cup of unsweetened coconut flakes and 1 cup of chopped pecans. Use sugar-free maple syrup or monk fruit sweetener. Adjust wet ingredients to maintain the 1:2.5 ratio.
Common Mistake to Avoid
The biggest error is not pressing firmly enough. A loose pack means crumbly bars. Press until the mixture feels compact and doesn't shift when you shake the pan. Another mistake is skipping the chill time — the bars need that hour to set. Cut too soon and they'll fall apart.
Takeaway
A good make-ahead camping breakfast bar should survive a bumpy trail and a warm pocket. This ratio-based method gives you control over texture and sweetness. Adjust the add-ins to your taste, but keep the binder-to-dry ratio steady. That's the technique that turns a crumbly mess into a reliable camp breakfast.
Frequently Asked Questions
Can I make these bars without a refrigerator?
Yes. The bars are shelf-stable once set. In cool weather (below 70°F), they can be stored in a sealed container for up to 5 days. In hot weather, keep them in a cooler to prevent softening.
What can I substitute for almond butter?
Sunflower seed butter works well for a nut-free version. Tahini also works but gives a stronger flavor. Avoid peanut butter if you need a nut-free option.
How do I keep the bars from falling apart?
Press the mixture very firmly into the pan. Use the back of a measuring cup or your hands. The wet-to-dry ratio is key: if the mixture seems dry, add 1 tablespoon of warm water or extra honey.
No-Bake Camping Breakfast Bars
These no-bake breakfast bars are dense, chewy, and packed with oats, nuts, and dried fruit. Made ahead and stored without refrigeration, they're a perfect grab-and-go camp breakfast.
- mixing bowl
- 9x13-inch pan
- parchment paper
- sharp knife
- 2 cups rolled oats (certified gluten-free if needed)
- 1 cup unsweetened shredded coconut
- 1/2 cup chopped almonds (or seeds for nut-free)
- 1/2 cup dried cranberries or chopped apricots
- 1/2 cup creamy almond butter (or sunflower seed butter)
- 1/3 cup honey (or maple syrup for vegan)
- 2 tablespoons coconut oil
- 1 teaspoon vanilla extract
- 1/4 teaspoon salt
- Line a 9x13-inch pan with parchment paper, leaving overhang on two sides.
- In a large bowl, combine oats, coconut, almonds, and dried fruit. Stir well.
- In a small saucepan over low heat, warm almond butter, honey, coconut oil, vanilla, and salt. Stir until smooth and fully combined. Do not boil.
- Pour the warm wet mixture over the dry ingredients. Stir with a spatula until every oat is coated. The mixture should hold together when pressed.
- Transfer to the prepared pan. Press down firmly and evenly with the back of a spatula or your hands. The tighter you press, the better the bars will hold.
- Refrigerate for at least 1 hour to set. Then lift out using the parchment overhang and cut into 12 bars.
- Wrap each bar individually in wax paper or store in a sealed container. No refrigeration needed for up to 5 days.
For hot weather camping, these bars can soften. Keep them in the cooler if temperatures exceed 80°F. Substitute almond butter with sunflower seed butter for a nut-free version. Maple syrup instead of honey makes these vegan. Always check labels for gluten-free oats if needed. For food safety, if the bars feel sticky or warm, store in a cooler. Consult a healthcare professional for personal dietary advice.
Recipe: No-Bake Camping Breakfast Bars
Equipment
- mixing bowl
- 9x13-inch pan
- parchment paper
- sharp knife
Ingredients
- 2 cups rolled oats (certified gluten-free if needed)
- 1 cup unsweetened shredded coconut
- 1/2 cup chopped almonds (or seeds for nut-free)
- 1/2 cup dried cranberries or chopped apricots
- 1/2 cup creamy almond butter (or sunflower seed butter)
- 1/3 cup honey (or maple syrup for vegan)
- 2 tablespoons coconut oil
- 1 teaspoon vanilla extract
- 1/4 teaspoon salt
Instructions
- Line a 9x13-inch pan with parchment paper, leaving overhang on two sides.
- In a large bowl, combine oats, coconut, almonds, and dried fruit. Stir well.
- In a small saucepan over low heat, warm almond butter, honey, coconut oil, vanilla, and salt. Stir until smooth and fully combined. Do not boil.
- Pour the warm wet mixture over the dry ingredients. Stir with a spatula until every oat is coated. The mixture should hold together when pressed.
- Transfer to the prepared pan. Press down firmly and evenly with the back of a spatula or your hands. The tighter you press, the better the bars will hold.
- Refrigerate for at least 1 hour to set. Then lift out using the parchment overhang and cut into 12 bars.
- Wrap each bar individually in wax paper or store in a sealed container. No refrigeration needed for up to 5 days.