Simple Recipes to Make

Easy camp meals & family camping food

← Back to homeEasy Camping Granola Cups: A Family Breakfast Favorite
Family Camping Food

Easy Camping Granola Cups: A Family Breakfast Favorite

By Jannah liza

The first time I tried making granola cups for a camping trip, I ended up with a pile of crumbs. They looked promising coming out of the oven — golden, fragrant, perfectly cupped. But by the time we reached the campsite, they had shattered into a thousand pieces. That's when I learned the trick: the right ratio of binder to dry ingredients and a firm hand when pressing.

Hand pressing granola mixture into a muffin tin cup to form a cup shape

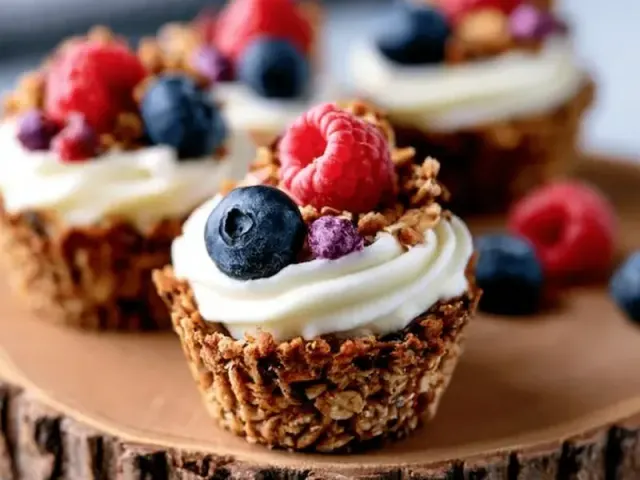
These easy camping granola cups are a family favorite because they're portable, make-ahead, and endlessly customizable. You can bake them at home, pack them in a sturdy container, and fill them at the campsite with yogurt and fruit for a breakfast that feels special but takes zero effort in the morning. The key is getting the texture right — crispy enough to hold their shape, but not so brittle they break.

My Ratio for Sturdy Granola Cups

I keep the ratio at 2 parts dry to 1 part wet by volume. For every 2 cups of oats, coconut, nuts, and seeds combined, I use 1 cup of liquid sweetener and fat combined. That means 1/3 cup honey and 1/3 cup melted coconut oil for the 2 cups of dry mix. This gives enough stickiness to form a solid cup without making it greasy.

The dry mix is simple: rolled oats as the base, shredded coconut for texture, and a mix of chopped nuts and seeds for crunch. I avoid quick oats because they absorb moisture too fast and make the cups dense. Rolled oats give a chewy, sturdy structure.

For the wet binder, honey works best because it caramelizes and hardens as it cools. Maple syrup works too but makes a slightly softer cup. Coconut oil solidifies at room temperature, which helps the cups hold their shape. Butter works, but it stays softer, so the cups may be more delicate.

The Pressing Technique

This is where most people go wrong. You need to press the granola mixture into the muffin tin with real force. I use the back of a spoon and push down hard, especially on the bottom. Then I use my fingers to work the mixture up the sides, pressing firmly against the metal. The walls should be about 1/8 inch thick — thin enough to be crispy, thick enough to hold the filling.

If the mixture feels too crumbly to shape, add a teaspoon more honey. If it's too sticky, add a tablespoon more oats. The final texture should feel like damp sand that holds a shape when squeezed.

Baking at Camp or at Home

I bake these at home before the trip because it's easier to control the temperature. But they work just as well over a campfire if you have a camp Dutch oven. Place a trivet in the bottom to keep the muffin tin off the direct heat. Use about 8 hot coals underneath and 12 on the lid for a 12-inch Dutch oven. Bake for 12-15 minutes, rotating the lid and the oven halfway through. The cups are done when the edges are dark golden and the kitchen smells like toasted oats and coconut.

A common mistake is overbaking. The cups continue to crisp as they cool, so pull them out when the center still looks slightly soft. If you wait until they look fully done, they'll be hard as rocks.

Packing and Filling at the Campsite

Once the cups are completely cool, stack them in a hard-sided container with parchment paper between layers. Don't use a soft bag — they'll crush. Pack the yogurt in a separate container and keep it cold in a cooler with ice packs. Bring a bag of pre-washed berries or sliced bananas.

At breakfast, let everyone build their own cup. Spoon in yogurt, top with fruit, and eat immediately. The granola stays crispy for about 30 minutes after filling, so don't prep them the night before. If you want a sweet drizzle, bring a small bottle of honey or maple syrup.

Variations for Different Tastes

For a chocolate version, add 2 tablespoons of cocoa powder to the dry mix and reduce the oats by 2 tablespoons. For a savory breakfast, skip the sweetener and use olive oil instead of coconut oil. Fill with scrambled eggs and shredded cheese — but serve right away because the eggs will soften the cup.

If someone in your group has a nut allergy, omit the nuts and add an extra 1/4 cup of seeds. For gluten sensitivity, use certified gluten-free oats. For dairy-free, use coconut yogurt and coconut oil. These swaps work without changing the texture.

Food Safety at Camp

Yogurt is perishable, so keep it below 40°F in a well-packed cooler. I use a separate cooler for drinks to avoid opening the food cooler repeatedly. Once filled, eat within 30 minutes. Don't leave filled cups sitting out in warm weather. If you're hiking with these, pack the cups empty and carry yogurt in a small insulated bottle.

For families with young kids, these cups are easy to hold and eat without a mess. The sides are sturdy enough to contain the filling, and the crunchy texture is satisfying without being hard to bite.

Takeaway

The secret to these easy camping granola cups is the binder-to-dry ratio and a firm press. Once you nail that, you have a portable, make-ahead breakfast that turns a campsite morning into something special. Bake them at home, pack them carefully, and let the kids fill their own cups. It's that simple.

Frequently Asked Questions

Can I make granola cups without an oven?

Yes. Use a camp Dutch oven with a lid and a few hot coals on top and bottom. Place the muffin tin inside and bake for 12-15 minutes, rotating once. Or use a portable camp stove with an oven attachment. Keep the heat low and steady.

Why do my granola cups fall apart?

Two common reasons: not enough binder (honey/oil) or not pressing the mixture firmly enough. The mixture should clump when squeezed. Press it hard into the tin, especially the sides. Also, let them cool completely before removing — they need that time to set.

Can I freeze unfilled granola cups?

Yes. Stack them in an airtight container with parchment between layers. Freeze for up to 1 month. Thaw at room temperature for 15 minutes before filling. Do not freeze filled cups — the yogurt will separate and make the cups soggy.

What fillings work best for kids?

Kids love sweet fillings. Try vanilla yogurt with sliced strawberries and a drizzle of honey, or chocolate yogurt with banana slices. For a savory twist, fill with scrambled eggs and cheese — but serve immediately.