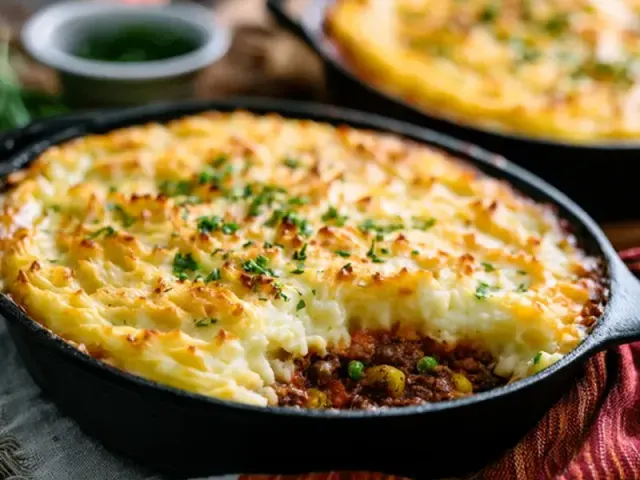
Cozy Cast Iron Camping Shepherd's Pie
The smell of browned meat and onions mingling with wood smoke is pure camp comfort. A cast iron shepherd's pie delivers that cozy, one-dish heartiness you crave after a long day of hiking or paddling. No oven required — just a skillet, a small pot, and a fire.

I keep the meat-to-potato ratio at about 1:1 by volume. That means for every cup of filling, you get a generous cup of mash on top. It’s not too heavy, but it sticks to your ribs. Here’s how to pull it off over a campfire or camp stove.
Building the Filling
Start with your protein. Ground beef is classic, but ground lamb is traditional for shepherd’s pie. If you use lamb, consider adding a pinch of rosemary instead of thyme. Brown the meat in a preheated cast iron skillet over medium heat. Don’t crowd the pan — work in batches if needed. You want a good sear, not steamed meat. Once browned, remove it and cook the aromatics in the rendered fat.
Onions and carrots are my go-to. Dice them small, about 1/4-inch, so they cook quickly and blend into the sauce. Sauté until the onions are translucent and the carrots have softened, about 5 minutes. Add the garlic for the last 30 seconds — it burns fast over a campfire.
Return the meat to the skillet. Stir in tomato paste and cook it for a minute to deepen the flavor. Then add the broth. I use beef broth from a carton or cubes dissolved in water. The liquid should just cover the meat and vegetables. Let it simmer until it thickens slightly, about 3-4 minutes. The peas go in at the end to keep their bright color and pop.
Common mistake: adding the peas too early. They turn mushy and lose their sweetness. Stir them in after you take the skillet off the heat.
The Perfect Camp Mash
While the filling simmers, boil your potatoes in a separate pot. Cut them into uniform 1-inch cubes for even cooking. Yukon Golds give a buttery, creamy mash without needing much dairy. Russets work too, but they absorb more liquid, so adjust the milk.
Drain the potatoes well. Return them to the pot over low heat for 30 seconds to steam off excess moisture. This is a small step that makes a big difference — dry potatoes mash fluffier and absorb butter better. Add butter and milk (or cream), and mash until smooth. Season with salt and pepper. Taste it. It should be slightly saltier than you think, because the potatoes will mellow against the savory filling.
Assembling and Browning
Spoon the mash over the filling in the skillet. Spread it to the edges to seal in the steam. Use a fork to create peaks and valleys on the surface — those ridges get crispy and golden. If you’re adding cheese, sprinkle it over the top now.
Now for the browning. Over a camp stove, cover the skillet with a lid or a piece of foil. Cook over medium-low heat for 10-15 minutes. The trapped steam heats the filling, and the direct heat browns the bottom edges. For a browned top, remove the cover for the last 3 minutes. If you’re cooking over a campfire, place the skillet on a bed of coals and put a few coals on top of the foil lid. This mimics an oven’s ambient heat. Check after 10 minutes — the top should be golden and the filling bubbling at the edges.
Let the pie rest for 5 minutes before serving. This sets the layers so they don’t slide apart on the plate.
Adaptations for Your Gear
Camp Stove
Use a medium flame for the filling and a low flame for the final bake. If your stove has a simmer setting, use it. A lid helps retain heat.
Campfire
Build a medium-hot fire and let it burn down to coals. Rake a flat bed of coals for the skillet. For the final bake, place a few coals on the foil lid. Check the bottom occasionally to prevent scorching — cast iron holds heat well, but coals are intense.
Make Ahead
Assemble the entire dish at home, right in the skillet. Cover and refrigerate. At camp, cook over medium-low heat until the center reaches 160°F (71°C) for the meat, then brown the top as directed. This cuts camp cooking time in half.
Takeaway
A cast iron camping shepherd’s pie is more than a meal — it’s a warm, savory anchor at the end of a day outdoors. The technique is simple: a well-browned filling, a creamy mash, and a bit of patience with the fire. Nail those three, and you’ll have a dish that tastes like home, even when home is a patch of dirt and stars.
Frequently Asked Questions
Can I make the mashed potatoes ahead of time?
Yes. Prepare the mashed potatoes at home, let them cool completely, and store them in a sealed container in your cooler. At the campsite, reheat them gently in a pot over low heat, adding a splash of milk or water to loosen them before spreading over the filling.
How do I brown the top without an oven?
Use a campfire or grill lid: cover the skillet loosely with foil and place a few hot coals on top. Or use a camp stove with a low flame and cover the skillet with a lid (or foil) to trap heat. The key is indirect heat from above. You can also finish the dish with a kitchen torch if you have one.
Can I use instant mashed potatoes?
Yes, in a pinch. Prepare them according to the package directions but use less water or milk for a thicker consistency. They won't be as creamy, but they work for a quick camp meal. I prefer real potatoes for texture and flavor.
What if I don't have a cast iron skillet?
You can use a heavy-bottomed pot or a Dutch oven. The technique is the same. If using a thin pan, be careful not to scorch the bottom. A Dutch oven works especially well because you can place coals on its lid for even browning.