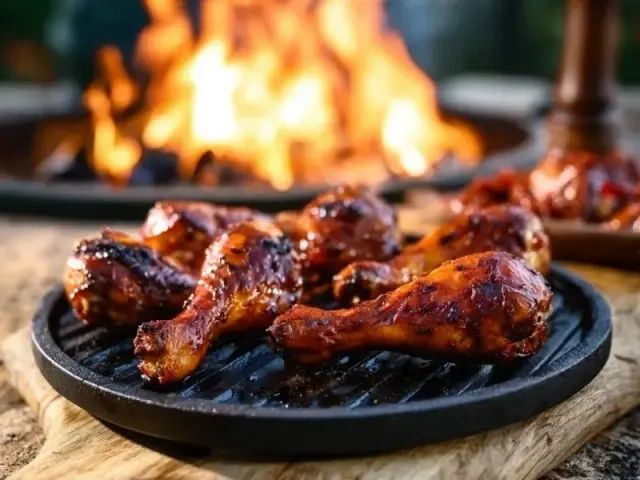
Campfire Chicken Drumsticks: Crowd-Pleasing Recipe
The first thing you notice is the smoke—sweet and sharp, carrying the scent of paprika and honey as it curls up through the trees. Then comes the sizzle: a steady, satisfying hiss as the glaze hits hot cast iron. Crowd-pleasing campfire chicken drumsticks deliver exactly what the name promises: juicy meat, crispy skin, and a sticky-sweet-savory glaze that makes people reach for seconds before they've finished firsts.

Why Drumsticks Work for a Crowd
Drumsticks are forgiving. They're smaller than thighs or breasts, so they cook fast and evenly over fire. The bone keeps the meat moist, and the skin crisps up beautifully when you give it direct heat. For a group of six, twelve drumsticks fit in a single 12-inch cast iron skillet with room to turn them. That's a full meal from one pan.
The key is the glaze—and when you add it. Add it too early and the sugars burn, leaving you with bitter black spots. Add it too late and the meat stays pale. I brush the glaze on during the last five to seven minutes of cooking, flipping once, so it caramelizes without scorching.
Building the Right Fire
Start your fire at least 30 minutes before you plan to cook. You want a bed of glowing coals with no flames—medium-hot heat that you can hold your hand over at grate height for four to five seconds. If the fire is too hot, the outside will burn before the inside reaches 165°F. Too cool, and the skin stays flabby.
Set your cast iron skillet directly on the coals, or place a grill grate over them. If using a grate, oil it lightly with a paper towel dipped in vegetable oil. I prefer a skillet because it catches drips and prevents flare-ups from the glaze.
Spice Rub First, Glaze Second
Pat the drumsticks dry. This is not optional—dry skin crisps; wet skin steams. Mix salt, pepper, smoked paprika, garlic powder, and a pinch of cayenne if you want heat. Rub it all over the meat, getting under the skin where you can. Let the drumsticks rest at room temperature for 15 minutes while the fire settles.
Meanwhile, whisk together honey, soy sauce, ketchup, and apple cider vinegar. The vinegar cuts the sweetness and helps the glaze stick. Taste it. It should be sweet, salty, and a little tangy.
The Cooking Method
Place the drumsticks in the hot skillet in a single layer. Don't crowd them—leave a finger's width between each. Cook for 12 to 15 minutes, turning every 5 minutes with long-handled tongs. You'll see the skin turn golden and start to tighten. At this point, the internal temperature should be around 140°F to 150°F.
Now brush the glaze on. Coat the top side, flip, coat the other side. Cook 5 to 7 minutes more, turning once. The glaze will bubble and darken. Watch it closely—if it starts to smoke heavily, move the skillet to the edge of the fire or lift it onto a stone. The finished drumsticks should read 165°F on an instant-read thermometer inserted into the thickest part without touching bone.
Visual Doneness Cues
When the drumsticks are done, the skin is deep amber with patches of darker caramelization. The meat near the bone is no longer pink, and the juices run clear. Let them rest for three minutes off the heat. The glaze sets into a tacky coating that doesn't slide off when you bite.
Common Mistake: Glazing Too Early
The most common error I see is brushing the glaze on at the start. The sugar burns, the drumsticks look charred but are undercooked inside, and the whole pan gets a bitter taste. Stick to the last five to seven minutes. If you want more glaze, brush a second light coat right before serving.
Adapting for Grill or Camp Stove
On a propane camp stove, use a cast iron skillet over medium-high heat. Cook the drumsticks 15 minutes, turning often, then glaze and finish 5 to 7 minutes. On a charcoal grill, set up a two-zone fire: cook over indirect heat (no coals directly under the meat) for 20 minutes, then move over direct heat for the glaze finish.
Serving and Storage
Serve these straight from the skillet. They pair well with foil packet potatoes, a simple coleslaw, or grilled corn. Leftovers keep in a sealed container in a cooler with ice for up to two days. Reheat over low coals or in a skillet until hot throughout.
Food Safety Note
Keep raw drumsticks in a cooler below 40°F until ready to cook. Do not leave cooked drumsticks out for more than two hours (one hour if the air temperature is above 90°F). Always cook poultry to an internal temperature of 165°F. Use separate utensils and cutting boards for raw chicken to avoid cross-contamination.
For special diets: this recipe contains honey (sugar) and soy (gluten if using standard soy sauce). Substitute tamari for gluten-free. It is naturally dairy-free and nut-free. If you need to adjust for health conditions, consult a qualified professional for personal dietary advice.
The Takeaway
Crowd-pleasing campfire chicken drumsticks are about timing and heat management. Dry the skin, season boldly, build a medium-hot coal bed, and glaze late. The result is a smoky, sticky, satisfying dinner that makes everyone around the fire happy. No complicated steps, no fancy gear—just good technique and a little patience.
Frequently Asked Questions
How do I know when chicken drumsticks are done over a campfire?
Use an instant-read thermometer inserted into the thickest part of the drumstick without touching bone. The safe internal temperature is 165°F. If you don't have a thermometer, cut into the thickest drumstick near the bone—juices should run clear, and the meat should no longer be pink at the bone.
Can I make these ahead of time and reheat at camp?
Yes. Cook the drumsticks fully at home, let cool, and store in a sealed container in a cooler with ice. At camp, reheat over low coals or in a skillet for 5-7 minutes, turning once, until hot throughout. Glaze may darken but will still be delicious.
What if I don't have a cast iron skillet?
You can cook drumsticks directly on a greased grill grate over the coals. Alternatively, make foil packet drumsticks: wrap each drumstick in heavy-duty foil with a drizzle of oil, cook 20-25 minutes over coals, then open the foil and brush with glaze, cooking 5 more minutes.
How do I prevent the glaze from burning?
Add the glaze only during the last 5-7 minutes of cooking. The sugars in honey and ketchup burn quickly over high heat. Keep the coals medium-hot (not raging) and watch closely. If the glaze starts to scorch, move the skillet to a cooler spot on the fire.